>

When I first started learning how to crochet, I scavenged the internet for all the free patterns I could get. I looked through crochetpatterncentral.com daily, always checking the “What’s New” page first. I loved that all these people had worked on something and shared their knowledge for free. Then I started buying patterns from Ravelry and discovered all the work that went into both the free patterns and the pay patterns. Really I wasn’t deterred either way, and would gladly pay for a pattern I really loved.
I always love to give away free patterns or tutorials here on Crafty is Cool, and I thought if I gave myself a schedule I’d be more inclined to keep doing it! So here you have it: First Friday Free Pattern! On the first Friday of every month I’m going to post a free pattern. I hope you enjoy the first one!
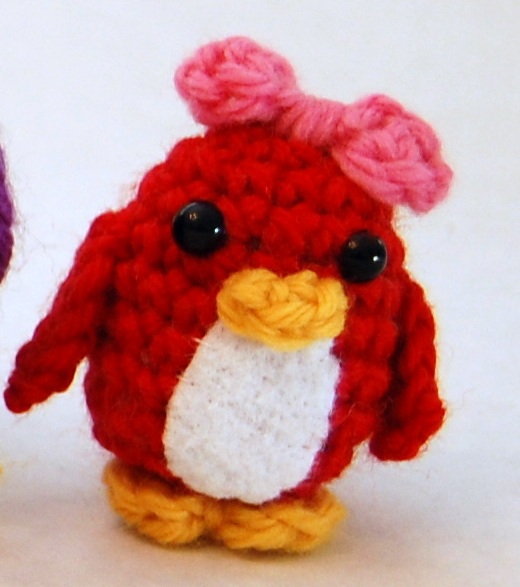
This Tiny Penguin has a special place in my heart. My sweet cousin Marissa collects penguins. When she saw the pictures of the Nesting Penguins I had made for Spool magazine, she loved them! When her wedding day came, my mom and sisters and I all went to see the bride before she walked down the aisle. I took her a pair of these Tiny Penguins, one with a black bowtie and one with a little white veil. She flipped. I was so happy for her that day and was so glad I could make her so happy. I hope this little penguin makes you or someone you know that happy too!

You will need…
Yarn:
Cascade 220 — Desired color for body, yellow, and pink for bow
Hook:
Size D/3.25 mm
Notions:
White felt
Black safety eyes 6mm
White thread
Yarn needle
Embroidery needle
Polyester stuffing
Key:
ch: chain
sc: single crochet
hdc: half double crochet
dc: double crochet
tr: triple crochet
st: stitch
sc2tog: single crochet 2 st together (decrease)
Tiny Penguin:
Body:
Starting at top of head, make an adjustable ring, ch 1, and sc 6 into the ring. Pull closed.
R1: Work 2sc into each st (12)
R2: (2sc into next st, sc into next 3 st)* rep to end of round (15)
R3-7: sc into each st (15)
R8: (sc2tog, sc into next 3st)* rep to end of round (12)
*Insert safety eyes as shown and stuff firmly.
R9: sc2tog around (6)
Fasten off. Use yarn tail to sew opening closed.
Wings (make 2):
With main color yarn, ch 6. Hdc into 3rd ch from hook, sc into next 2 ch, and sl st into last ch. Cut yarn and weave in ends. Use yarn tail to sew wings to body. The top should be at eye level.
Tummy:
Cut a small oval from white felt, using the penguin’s body to help measure the size. Sew to penguin’s body with white thread.
Beak:
With yellow yarn, make an adjustable ring, ch 1, and sc 3 into ring. Fasten off and use the yarn tail to sew beak to penguin’s face just above the tummy.
Feet:
With yellow yarn, ch 6. 2hdc into 3rd ch from hook, sl st into next ch, 2hdc into next ch, and join with a sl st to first ch. Fasten off and use yarn tail to sew to the bottom front of penguin.
Bow:
With pink yarn, ch 8. Dc into 4th ch from hook, ch 1, sl st into next ch, ch 1, skip next ch, dc into next ch, ch 1, sl st to first ch. Fasten off and use yarn tail to sew to top of penguin’s head.
If you liked making this penguin, please check out the full pattern for all the penguins that nest around this tiny one. Its now available here in my shop! Click on “Shop for Craftyiscool Patterns” above to see it and all of my other patterns!