
We have shelves and shelves of kids’ books. I’m kind of a hoarder in that regard. I love going to Goodwill or the Salvation Army store and picking up armloads for 50 cents each. If you looked through our books about 75% would have a thrift store price tag on them. I try to get my kids to pick a different book every night, but you can only read a Spongebob beginning reader book so many times before you want to put it through a shredder. Dora the Explorer books and books based on kids’ movies, the same. When you read a really good children’s book, however, you don’t mind when your kid asks for it for the 5th time that week. Take the Sneetches, for example. Does my five year old understand that its a story about non-conformity and prejudice? Probably not. But he does think that Sylvester McMonkey McBean is pretty kooky. He likes to see them all pay “ten dollars eaches” and have those stars disappear and come back again in his amazing machine. But I have a feeling that when he’s reading the story about bellies with stars and others with “none upon thars”, he’ll grow up with a little more of an open mind. Its what Dr. Suess would have wanted.
Before you get started, some inspiration. If you haven’t watched this before, I encourage you to take a minute now, because it is just plain awesome. The catchy 70s music will eat you up!
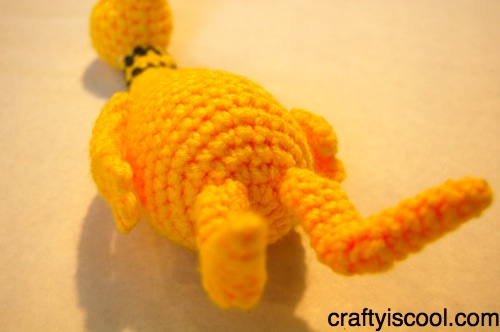
This crocheted amigurumi sneetch is easy to make and fun to play with. His belly star is attached with velcro so he can take it off and put it back on again. He’ll be invited to all the marshmallow toasts and frankfurter roasts that way.
Sneetch:
You will need:
Materials:
Yellow worsted weight yarn
Gray worsted weight yarn
White fuzzy yarn (baby or “cloud” yarn)
White felt
Green felt
6mm black safety eyes
Black embroidery floss
Small piece of velcro, just the “hook” side, sew-on type
Tools:
Size E crochet hook
Yarn needle
Embroidery needle
Body:
Rnd 1: Starting at the bottom of the body with yellow yarn, make an adjustable ring, ch 1, and sc 6 into the ring. Pull tail tightly to close hole. (6)
Rnd 2: Work 2 sc into each st (12)
Rnd 3: (2 sc into next st, sc into next st)* repeat around (18)
Rnd 4: (2 sc into next st, sc into next 2 st)* rep around (24)
Rnd 5: (2 sc into next st, sc into next 3 st)* rep around (30)
Rnd 6-9: Sc into each st (30)
Rnd 10: (Sc2tog, sc into next 8 st)* rep around (27)
Rnd 11: Sc into each st (27)
Rnd 12: (Sc2tog, sc into next 7 st)* rep around (24)
Rnd 13: Sc into each st (24)
Rnd 14: (Sc2tog, sc into next 6 st)* rep around (21)
Rnd 15: (Sc2tog, sc into next 5 st)* rep around (18)
Rnd 16: (Sc2tog, sc into next 4 st)* rep around (15)
Rnd 17: (Sc2tog, sc into next 3 st)* rep around (12)
Rnd 18: (Sc2tog, sc into next 4 st)* rep around (10)
Rnd 19-21: Sc into each st (10)
* Insert stuffing into the larger bottom part of the body before you proceed with the neck (or you’ll be sorry)!
Rnd 22: Sc2tog, sc into next 8 (9)
Rnd 23: Sc into each st (9)
*Change to gray yarn at last st of Rnd 23.
Rnd 24: Sc into each st (9)
*Change to yellow yarn at last st of Rnd 24.
Rnd 25-26: Sc into each st (9)
*Change to gray yarn at last st of Rnd 26.
Rnd 27: Sc into each st (9)
*Change to yellow yarn at last st of Rnd 27. You can cut the gray yarn. Work the next few stitches over the end to secure.
Rnd 28: Sc into each st (9)
Fasten off and cut tail short. Stuff the neck and set aside.
Head:
Rnd 1: Starting at the nose end of the head with yellow yarn, make an adjustable ring, ch 1, and sc 4 into the ring. Pull tail tightly to close hole. (4)
Rnd 2: Sc into each st (4)
Rnd 3: (2 Sc into next st, sc into next st)* rep to end (6)
Rnd 4: Sc into each st (6)
Rnd 5: (2 Sc into next st, sc into next 2 st)* rep to end (8)
Rnd 6: Sc into each st (8)
Rnd 7: (2 Sc into next st, sc into next st)* rep to end (12)
Rnd 8: (2 Sc into next st, sc into next 2 st)* rep to end (15)
Rnd 9-10: Sc into next 5 st, hdc into next 5 st, sc into next 5 st (15)
Rnd 11: Sc into next 5 st, hdc into next st, dc into next 3 st, hdc into next st, sc into next 5 st (15)
Rnd 12: (Sc2tog, sc into next 3 st)* rep to end (12)
*Cut tiny ovals from white felt. Cut a slit in each oval and insert the eye, then insert the eye into the face as shown, and attach washer on the inside. Stuff the head.
Rnd 13: Sc2tog around (6)
Fasten off and leave a long tail. Weave tail through last row of stitches to close hole, then down through bottom of head. Sew onto body and weave in ends.

Arm (Make 2):


Star:

